 This is the Archived Desktop Edition.
You should be transferred to the Newest Edition for Desktop and Mobile within 2 seconds.
Intravenous Infusions and Related Tasks
Lesson 1: Initiate an Intravenous Infusion and Manage a Patient With an Intravenous Infusion
1-6
1-6. PROCEDURE FOR INITIATING AN INTRAVENOUS INFUSION
a. Select a suitable vein for venipuncture.
b. Prepare the venipuncture site.
(1) Apply a constricting band two inches above the venipuncture site. The constricting band should be tight enough to occlude venous flow, but not so tight that distal pulses are lost.
(2) Select and palpate a prominent vein.
(3) Cleanse the skin with an alcohol swab using a spiral motion starting with the entry site and extending outward about two inches. Allow the site to dry.
c.Don gloves.
d. Perform the venipuncture.
(1) Using your nondominant hand, pull all local skin taut to stabilize the vein.
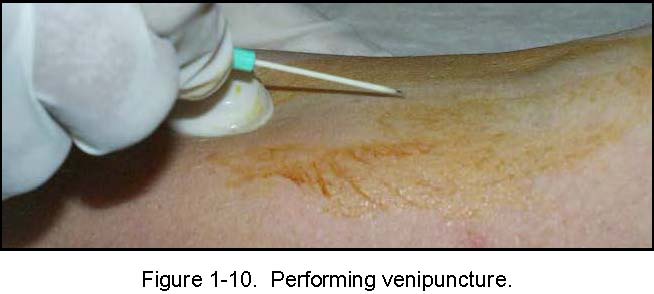
(2) With your dominant hand, position the distal bevel of the needle up and insert the cannula into the vein at approximately a 30 degree angle (figure 1-10).
(3) Continue inserting the needle until blood is observed in the flash chamber of the catheter.
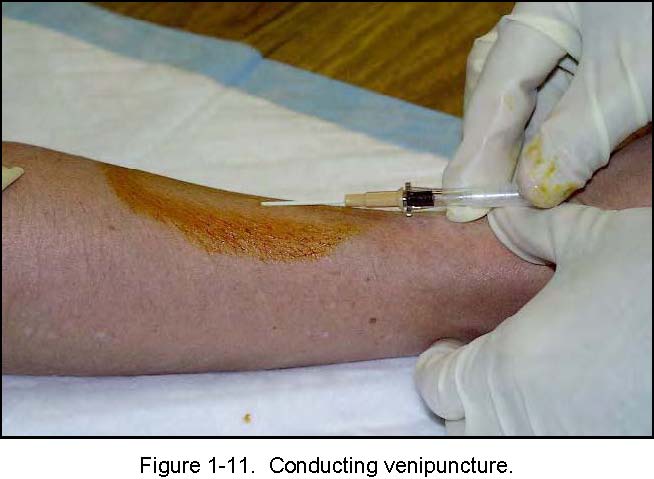
(4) Decrease the angle to 15 to 20 degrees and carefully advance the cannula approximately 0.5 centimeter farther (figure 1-11).
(5) While holding the needle stationary, advance the catheter into the vein with a twisting motion. Insert the catheter all the way to the hub.
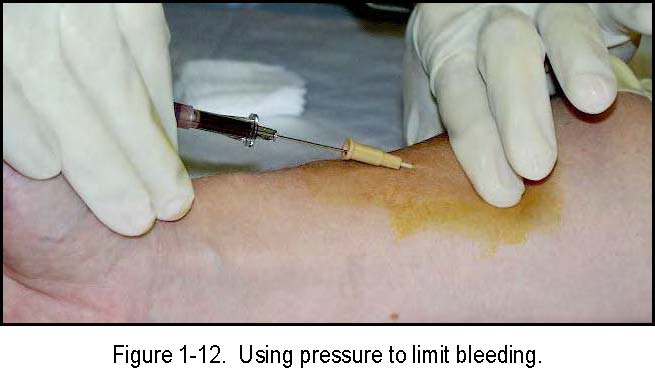
(6) Place a finger over the vein at the catheter tip and put pressure on the vein to prevent blood from flowing out the catheter (figure 1-12). (7) Remove the needle while maintaining firm catheter control.
e. Remove the constricting band.
f. Obtain venous blood samples as required.
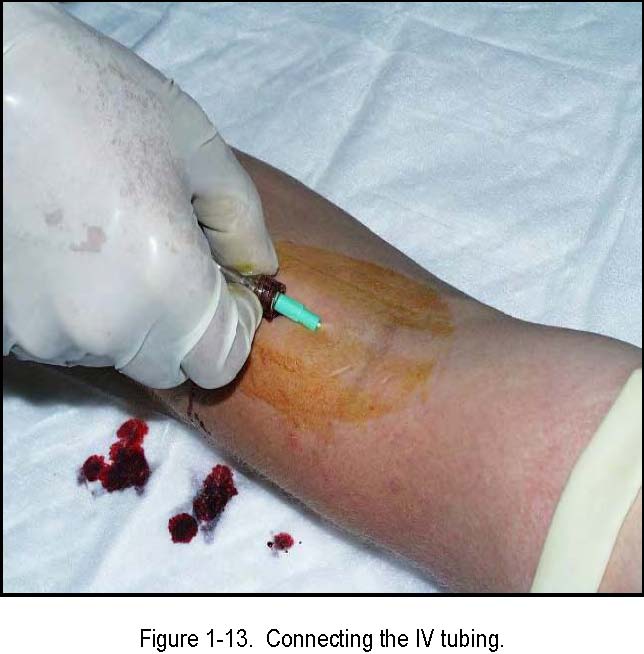
g. Attach the administration tubing to the cannula hub (figure 1-13) while maintaining stabilization of the hub with the non-dominant hand.
h. Open the flow-regulator clamp and observe for drips in the drip chamber. Allow the fluid to run freely for several seconds.
NOTE: You may drop the solution bag lower than the casualty's heart to observe for a backflash of blood to verify catheter placement.
i. Adjust to the desired flow rate.
j. Clean the area of blood, if necessary, and secure the hub of catheter with tape, leaving the hub and tubing connection visible. Make a small loop in the IV tubing and place a second piece of tape over the first to secure the loop (figure 1-14).
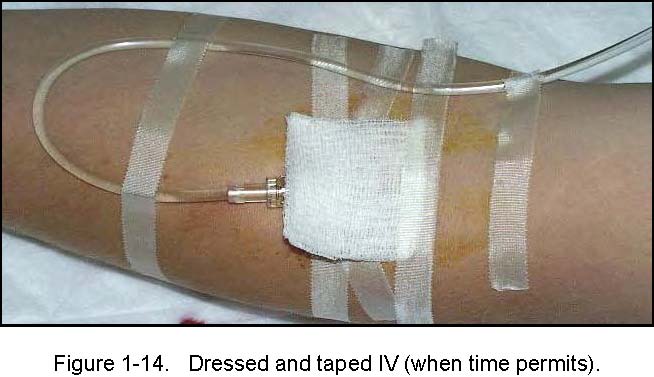
k. Apply a 2x2, a 4x4, or a transparent dressing Tegaderm™) over the venipuncture site (figure 1-14).
l. Label a piece of tape with date and time the IV was initiated, the catheter size, and your initials. Secure the tape over the dressing.
m. Monitor the casualty and continues to observe the venipuncture site for signs of infiltration. Discontinue the infusion if signs of infiltration are observed.
n. Remove your gloves and disposes of them appropriately.
o. Document the procedure on the appropriate medical form.
