 This is the Archived Desktop Edition.
You should be transferred to the Newest Edition for Desktop and Mobile within 2 seconds.
Intravenous Infusions and Related Tasks
Lesson 1: Initiate an Intravenous Infusion and Manage a Patient With an Intravenous Infusion
1-5
1-5. PREPARING TO INITIATE AN INTRAVENOUS INFUSION
a. Take body substance isolation (BSI) precautions (see Appendix).
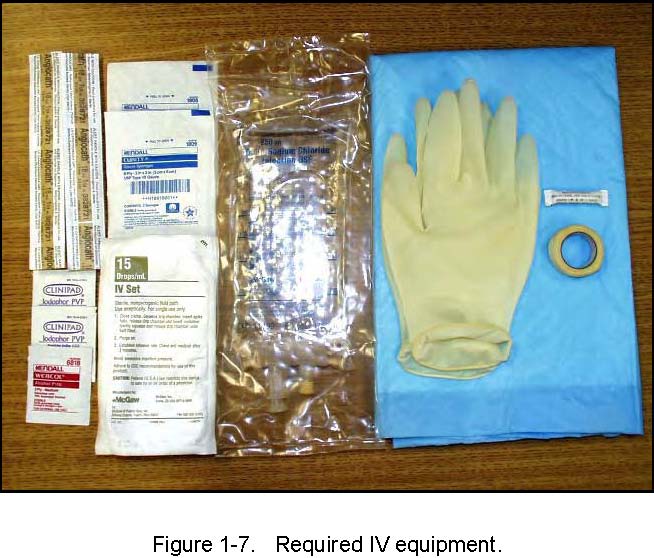
b. Assemble and arrange the necessary equipment (figure 1-7).
c. Explain the procedure to the casualty and ask about known allergies (if the casualty is conscious).
d. Prepare and inspect the IV equipment.
(1) Intravenous solution (check expiration date, check solution clarity, check for presence of punctures).
(2) Catheter/needle unit (check for sterility and presence of barbs). Do not touch any part of the catheter that enters the skin/vein.
(4) Insert the administration tubing spike into the IV solution port with a quick twist.
(5) Hang the IV solution container at least two feet above the level of the casualty's heart and squeeze the drip chamber until it is half full.
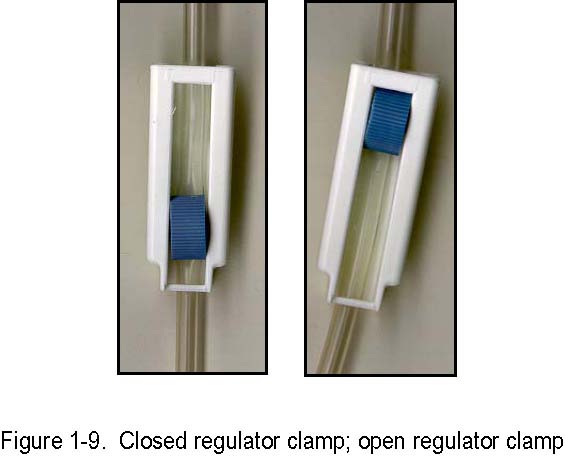
(6) Remove the protective cap from the tubing adapter and open the flow-regulator clamp (figure 1-9), allowing the fluid to flush all of the air from the tubing.
(7) Re-close the flow-regulator clamp and recap the tubing adapter. NOTE: Do not lose sight of the distal end of the tubing once uncapped.
(8) Cut several strips of tape and hangs them where they are readily accessible or prepare your Tegaderm™ dressing.
e. Prepare the intravenous equipment.
(1) Use a macro drip for all hypovolemic resuscitation (10 to 15 drops per milliliter).
(2) Stretch out the IV tubing and close off the flow-regulator clamp.
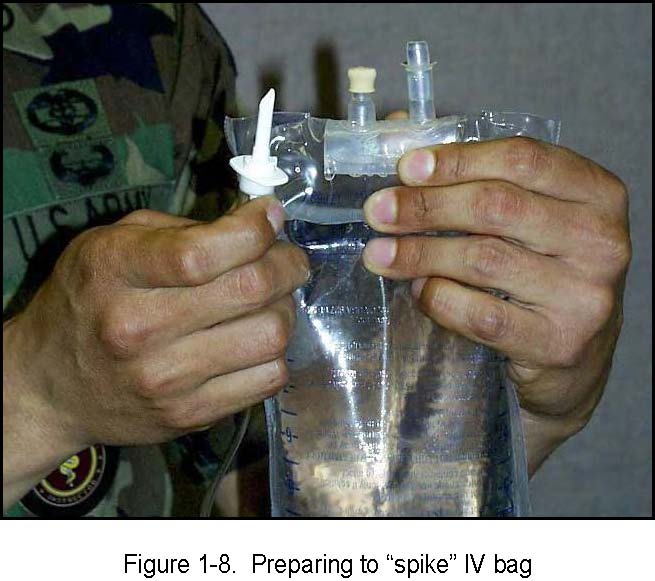
(3) Remove the protective covering from the port of the IV container and the protective covering from the spike of the administration set (figure 1-8).
(4) Insert the administration tubing spike into the IV solution port with a quick twist.
(5) Hang the IV solution container at least two feet above the level of the casualty's heart and squeeze the drip chamber until it is half full.
(6) Remove the protective cap from the tubing adapter and open the flowregulator clamp (figure 1-9), allowing the fluid to flush all of the air from the tubing.
(7) Re-close the flow-regulator clamp and recap the tubing adapter.
NOTE: Do not lose sight of the distal end of the tubing once uncapped.
(8) Cut several strips of tape and hangs them where they are readily accessible or prepare your Tegaderm™ dressing.
